How Do Drag Queens Hide Their Eyebrows?
Hello!
Today we're bringing to you a blog piece dedicated to the art of brow blocking.
What's brow blocking?
Brow blocking is the method of fully concealing the appearance of the brow, creating new space over which you can draw an entirely new brow shape, or opt for an editorial-inspired, brow-free look with endless space for eyeshadows, liners and pigment placement.
Brow blocking can take a while to get the hang of, but we have a few simple steps which make it easier to understand!
1) Start off with a clean, makeup-free brow.
It is important to start with brow blocking as the first step of your makeup look. This will enable you to flatten the hairs onto bare skin, as opposed to dragging the hairs onto any pigments or makeup previously applied to the face. Start fresh and you'll set yourself up for a much better result!

2) Choose your tools wisely!
While it might seem obvious to choose your brow glue based on it being a long-lasting, non-toxic, skin-safe formula, something worth keeping in mind is that by using a small brow comb with a flattened back to it will help you comb the glue through the brows while sweeping them into a fully flattened position on the face in the same motion.

3) Flatten brow hairs
TOP TIP: Laminating the brows with Brow Seal is an essential first step for laying brow hairs flat to the face.
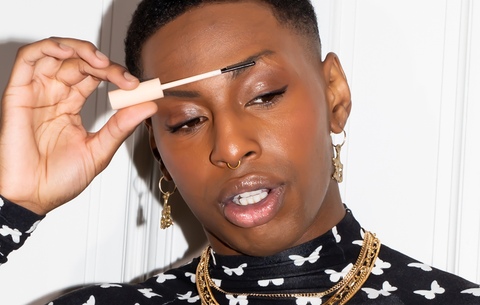
Once the product has been combed onto the hairs using your applicator, roll the applicator so that the back of the comb (the side without bristles) can smooth and flatten brow hairs to the skin.
Our applicator design for Brow Seal AND Brow Block helps to evenly distribute the product, making for a better, longer-lasting result for the brows. You'll want to comb your brows directly upwards using smooth, sweeping motions (so make sure not to glue them sideways or in any other direction).

4) Take your time by layering product
Make sure to fully allow the brows to set between layers of product. Once a layer of Brow Seal has been applied to laminate the hairs into place, follow with Brow Block, making sure to scoop the product onto the brows and spread the product so it fills any gaps, creating a flat base between each brow hair.
It may help to have a small portable fan nearby with which you can dry your brows while they set between each step. This all takes time, and a good result will make it worth the wait! Once you have glued your brows into a fully flattened, laminated position onto your face, check side-on in a mirror to make sure no hairs are falling down or poking forwards away from the position you have combed them into.
SHOP OUR BROW BUNDLE & SAVE 15%
5) Colour correct!
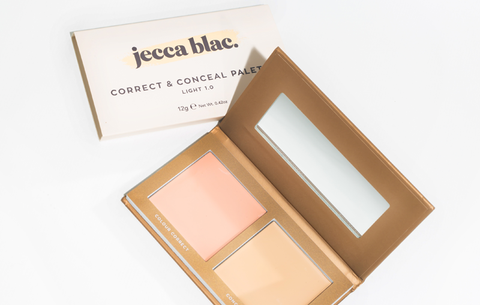
Now you've glued your brows, it's time to colour correct. We recommend our Correct & Conceal Palette for this - it was created with makeup wearers in mind who seek beard shadow coverage due to its simple and effective colour correction and concealing components. When applying this, use firm, slow, patting motions and focus the product onto any areas of the brow which seem particularly dark. This will help create a colour corrected, brightened base for concealing.

6) Pressed Powder
Now you've colour corrected, it's time to add powder. Use a powder puff and a foundation powder (note: not a transluscent setting powder or a loose powder) - make sure you've chosen a pressed powder, so one that comes in solid form in a mirror compact as opposed to a powder already in powder format. This will help you pack the most pigment onto your brows.
7) Conceal using a full coverage concealer
Once you've powdered your brows by packing the pressed pigment onto your brows with slow, patting motions, it's time to conceal using a full-coverage concealer such as our Liquid Concealer.
Paint the coverage on top of your powdered brows using a flat makeup brush, making sure to paint the coverage over your brows in the same direction you glued the brows into earlier (upwards!) While the concealer dries, you can use a fan to dry your brows as you may have been doing at each stage of the covering process. It also helps to copy each step on each brow as you go so both are symmetrical - doing this will also help maximise your time during each drying stage.

8) Repeat!
The rest of the brow coverage comes down to how many layers of powder followed by concealer you need to fully erase the appearance of the brows. Keep repeating each step til you get to the coverage you're happy with!

9) Brow freedom!
Once you have fully erased the appearance of your brows, you're left with a clean canvas over which you can create an entirely new brow shape, or get creative with endless eye space for shadows and pigments. The choice is yours for what you choose to go with!

We hope you've enjoyed our top tips for ultimate brow freedom! How will you choose to celebrate you brows?
